Wednesday, June 24, 2020

Lego Captain America


Commentary: 
I wanted to try something different for a change, so I decided to make my one of my favorite superheroes in Captain America. I do no know how many more I will be making of these but I will do my best to continue making different heroes in a somewhat Lego form. One thing I never understood about this character is why did no one ever shoot at his Cap's legs. I mean this joke was covered in Captain America Civil War, but I always had to this question prior to the movie. Also, how does he always have the shield come back to him when he throws it. I always assumed that he "calculated" the right angle to throw the shield so that it would come back to him. I guarantee if I threw the shield I would just end up breaking a window and losing it but whatever... it is a movie.

Model Details:
Pages: 3
Height: 4 in / 10.2 cm
Width: 3.63 in / 9.22 cm
Depth: 2.44 in / 6.2 cm
Download: 3D Model / Templates
Notes: The body and legs are pretty straightforward to build. The next parts are difficult to build as I had to build these parts 3 or 4 times so take your time

For the head there is a very thin circular piece attach it to the piece above it before starting to build the model. Besides that the head is pretty easy to build, close it with the piece with the big circle located at the bottom of the page

For the shield I built it without the thin circular and line piece by just gluing the shield to the red circle and trimming around the edges to clear the white out parts. I have left the pieces in the model just in case you want to use them.

Lastly for the arms. Build each piece separately. I did not use the tabs when attaching each part of the arm together as I just made sure the piece just hid the tabs. For the arm, start building at the forearm and work your way up to the shoulder and close it there making sure the white parts are covered.

If you read this entire sections I thank you, and you deserve a cookie anyways... Enjoy building!

Wednesday, June 17, 2020

Chibi Arceus


Commentary: 
Hey everyone, yes I am going to juice Arceus and releases each type separately (This is mainly cause I want to make an army of Arceuses of different colors... so yeah). Anyways... I was always wanted to catch this Pokemon in Platinum as I knew there was a way to catch, but I did not know how. I looked all over the Internet trying to figure out how to catch this Pokemon and I believed that there was a legitimate way of catching it. I probably spent a few weeks as a little kid searching how to catch this Pokemon to no avail. I gave up and just used an action replay to obtain an Arceus.  Little did I know that catching Arceus required a mystery gift that was given out years ago and I there was no way to obtain Arceus.

Model Details:
Pages: 3
Height: 4 in / 10.16 cm
Width: 2.53 in / 6.43
Depth: 4.08 in / 10.36 cm
Download: 3D Model / Templates
Notes: The body and head are simple and easy to build. The difficulty arrives when building the rings. I will do my best to explain. If you have questions regarding how to build this part feel free to ask it in the questions below. When building the rings flip the model around in Pepkaura Viewer and build each ring as if it is the back of the ring. Follow the PDO model for each piece goes and you may have to make a judgement call (puns😂) on where to attach each piece as there may not be a given connection. When done building both rings one side should be completely white and the other side should be yellow. There exists a yellow square on the third page for the next section. Glue the white part of the ring to the white part that aligns with the yellow square. Both rings should fit inside the square. Lastly cut out the ring side with the green gem and you should have two rings that have yellow on both sides. This part is probably the most difficult. Again, if you have any questions leave it in the comments below and enjoy building!

Saturday, June 13, 2020

Chibi Rattata


Commentary:
 Hello everyone! This model was technically the first Pokemon in which I generated the 3D Model and unfolded it to make the templates. Because it was the first model I made this model probably took me over a hundred hours just to make a basic Rattata model, as I had to learn how to use new programs. I decided to release this model now as it is following the other og Pokemon you would find on Route 1. Let me honest I have never used Rattata or Raticate in Pokemon so I do not have any good or bad opinions regarding the Pokemon

Model Details:
Pages: 1
Height: 2.05 in / 5.2 cm
Width: 2.26 in / 5.74 cm
Depth: 3.04 in / 7.72 cm
Download: 3D Model / Templates
Notes: This model is really easy and straightforward to build. My only advice is to add a weight at the back of the model to allow the model to stand by itself .Besides that...enjoy building!

Wednesday, June 10, 2020

Chibi Pidgey


Commentary: 
It is the og bird Pokemon you find at the beginning of the game. When I first started playing Pokemon I was actually excited to use a Pidgey during my playthrough of Firered, but I soon learned the uselessness of this Pokemon. I remember evolving Pidgey all the way up to a Pidgeot and leveling it up to level 55 and being disappointed that it only knew flying and normal type attacks. So after that run I never have used a Pidgey since. I have not played the newer games so I do not know if mega-pidgeot is any good.

Model Details:
Pages: 1
Height: 2.35 in / 6 cm
Width: 2.10 in / 5.3 cm
Depth: 2.32 in / 5.9 cm
Download: 3D Model / Templates
Notes: This model is not to hard to build just angle the model not perfectly straight on and use the tail piece to get the model to stand up. You may also want to trim the beak so it is not that long. Besides that enjoy building.

Saturday, June 6, 2020

Chibi Milotic


Commentary: 
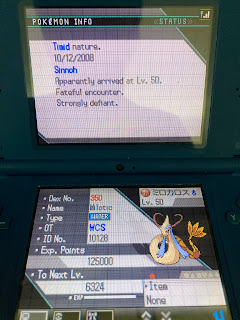
I never discovered this Pokemon until generation 5 when I could easily obtain it through trading it with a prism scale. Before that, I never knew how to make Pokeblocks or poffins to evolve a feebas (Yes I got lucky in Emerald and captured a Feebas without really too much effort in to it). Currently, Milotic is one of my favorite Pokemon to use as a special defensive tank with its ability marvel scale and the set of scald, ice beam, toxic and recovery. Looking back I found two shiny Milotics on Pokemon Black account. I have no clue where it came from so it is up to you on how you interpret it.


Model Details:
Pages: 1
Height: 2.8 in / 7.2 cm
Width: 2.4 in / 6 cm
Depth: 4 in / 10.2 cm
Download: 3D Model / Templates
Notes: This model is pretty straightforward to build just cut off the tabs on the head antennas and fold the piece over itself to get the desired shape. Glue the two pieces of the antenna together (without the tabs) to whatever angle you want. Place a weight in the model to allow the model to stand by itself. Besides that enjoy building!


Wednesday, June 3, 2020

M.O.A.R Glaives Boomerang Monkey


Commentary: 
I just decided to make all 4th tier towers of the boomerang monkey and this was the next one on the list. I personally never use this tower in game as I actually do not know the strengths or weaknesses of this tower. I am assuming that it is good group bloon popping power, but I prefer to use other towers to accomplish that job.

Model Details
Pages: 2
Height: 2.76 in / 7 cm
Width: 2.09 in / 5.3 cm
Depth: 2.42 in / 6.2 cm
Download: 3D Model / Templates
Notes: The body is pretty simple to build as it is similar to the other bloons tower defense monkeys I have built. My advice for the head is to build the hood of the head but do not put the piece underneath it. Before putting the bottom piece on, place the face on the front of the hood and trim it to the desired length so that it fits snugly in the hood. When closing the model just attach the legs and tail last so to get the model to stand properly. Besides that enjoy building!